

Here are the items laid out.
 |
| Gems, spray paint, E6000 glue, eye hooks, brackets, wood block |
 |
| Wire, 3 in 1 multi tool, extra bag of gems and spray paint (this is not needed for this project) |
The first thing that you want to do is draw the shape or outline of how you want to place your jewels on the piece of wood. I did this free hand.

Put two x's where you want to place the eye hooks. The eye hooks are where you are going to have the wire "antlers" coming off of. Then screw in the eye hooks. Make sure that they are vertical when they come through the back end as that is what you will attach the brackets to hang it on the wall with.
.JPG)

Next you want to shape your wire. You may want to use gloves to do this. And this is the hardest step. Hard in the sense that you want to stretch out your wire as long as you will want it and then curve the wire to form the "antlers". Just put some muscle into it..or sweet talk it so that it will move where you want it to! :)
This template was included in the kit but it is not necessary. This just gives you an idea of how long they can be and what shape to form them to.

 |
| Here is my husband showing how to form them |
Once you have formed the antlers (remember to double since there are two eye hooks), wrap the end around the eye hooks, tightly.

 |
| Here is a Paisley photo bomb! |

I also decided to do the entire block with spray paint, that way the space between the gems would not show wood behind it. Once the block was painted, I then painted the antlers so that they had gold tips!


Next you are going to apply the gems and bling it out!! You can either put glue on the wood and attach the gems or you can put glue on the gems one by one. I went with putting the glue on one by one and it was a bit tedious haha.
 |
| Although it is hard to tell in this picture, the block is all blue |
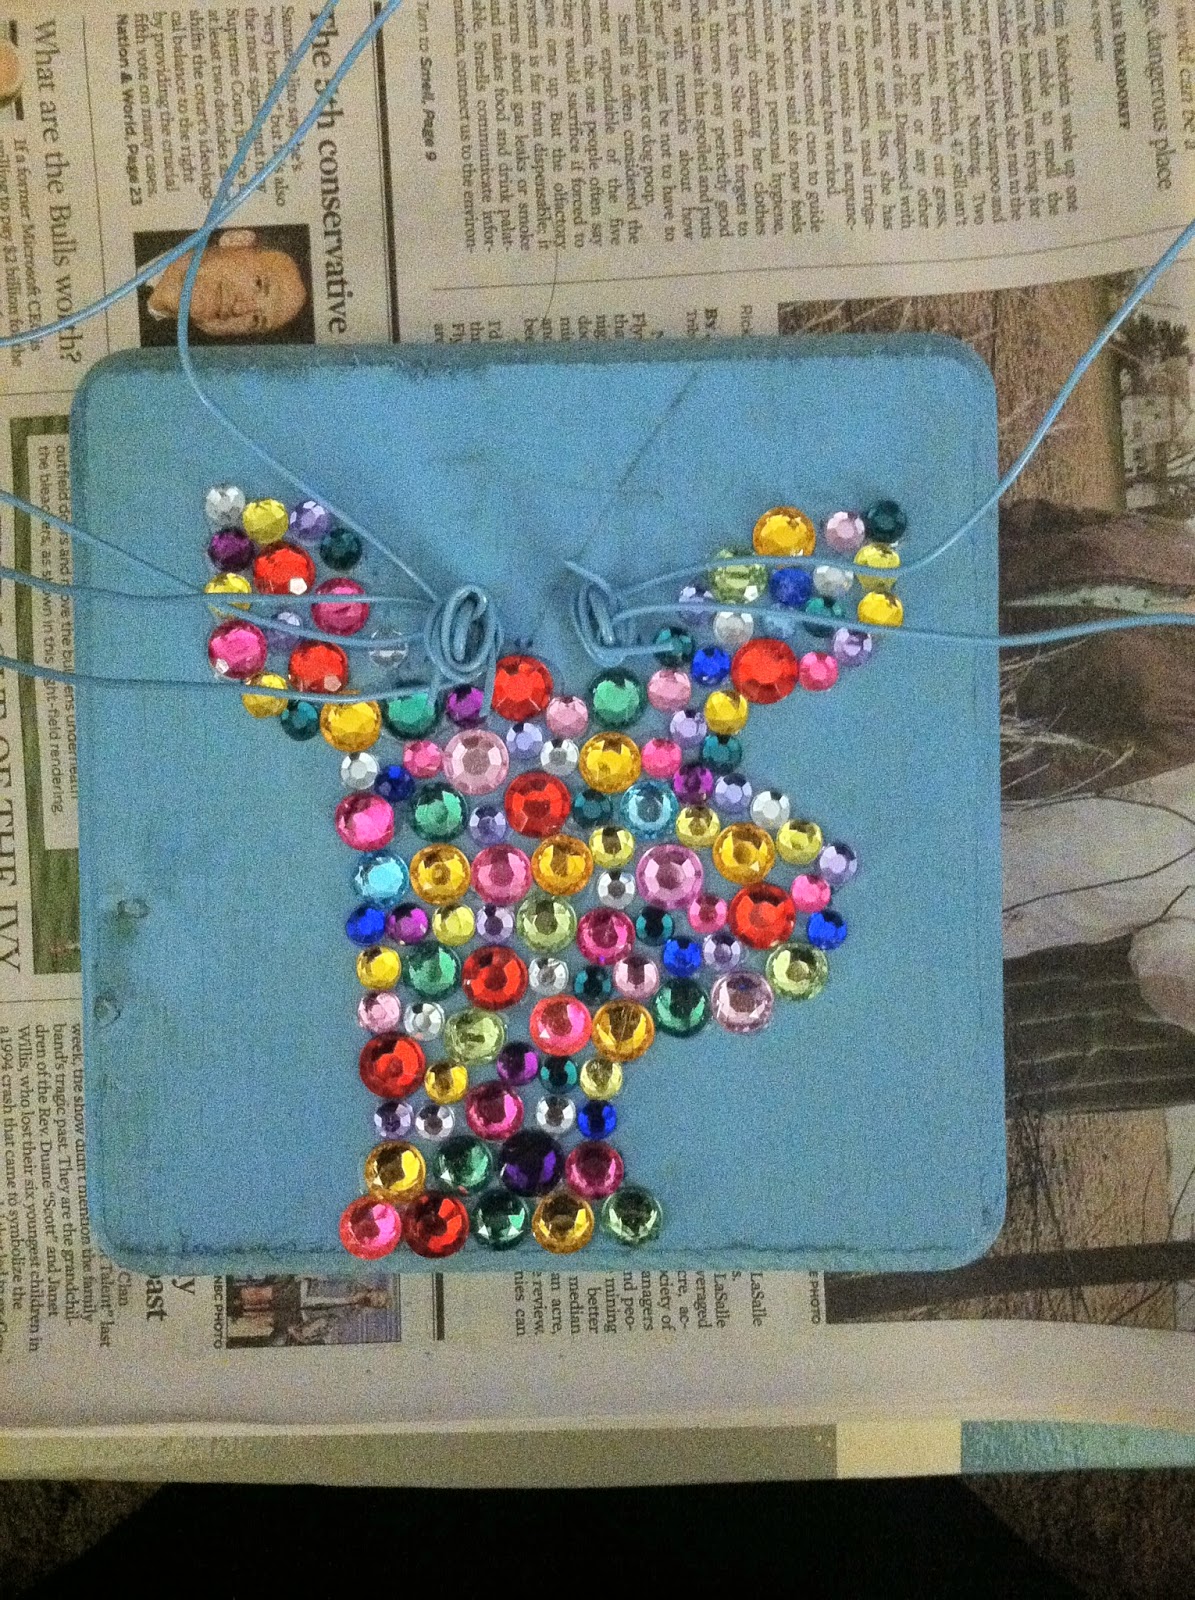
And here is the finished product!!!

I tested the strength with necklaces and the antlers did not move. If yours move, I would suggest just gluing the wire that is wrapped around the eye hooks for some stability.
I truly cannot say enough wonderful things about Darby Smart. As you can see by the note in the box they sent me, due to inventory this kit took a little while longer to arrive and they not only gave me a coupon towards my next purchase for $15 off but they also included an extra bag of paint and gems for my next jewelry project! The customer service and quality of their products is exceptional!! Use the link above to get $10 off your first purchase!!
What are your favorite crafts to do?
Do you have a homemade jewelry holder?
Have a great day!!


.jpg)
No comments:
Post a Comment